


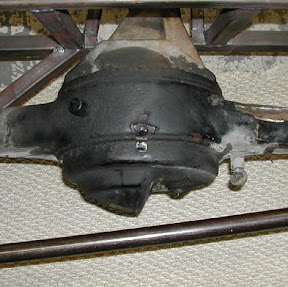
33. Panhard Rod
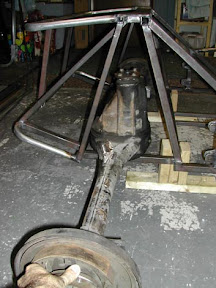
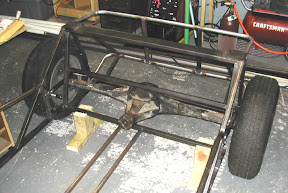
 The axle was fit into the chassis for the first time and wooden blocks were placed between the axle and the chassis to keep things in some initial position. There are also wooden blocks under the chassis to define the chassis's static ride height, which is typically between 5 and 7 inches. In this particular build, a chassis ride height of 7 inches was selected to provide plenty of road clearance.
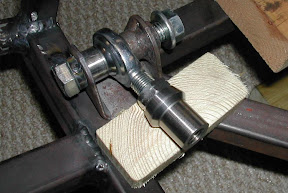
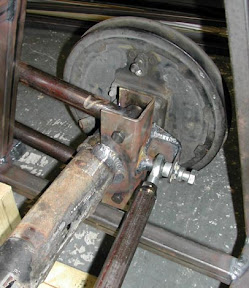
A left-hand threaded rod end, jam nut, and threaded tube adapter were placed into the panhard rod's axle bracket. The tube adapter and jam nut were threaded roughly half way down the rod end's threaded shaft to provide the maximum amount of adjustability in either direction once the panhard rod is fully assembled. A right-hand threaded rod end, jam nut, and tube adapter were then placed similiarly in the panhard rod's chassis bracket.
The next step was to bolt the trailing arms and tires to the axle so that everything is positioned at the chassis's static ride height, which is why the height of the wooden blocks holding up the chassis is so important.
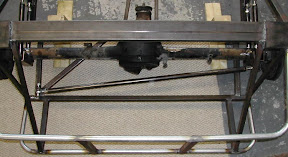
Now is the time to line everything up and pay special attention to the left-to-right positioning of the rear axle within the chassis. The trailing arms should be horizontal to the ground and parallel to each other, but this assumes that the position of the trailing arm brackets on the chassis were carefully determined before they were fully welded.
I was fortunate in this regard because my CAD model provided all the right measures and I was able to use a small level to confirm that my trailing arms were in fact parallel to the ground. It's really not that critical that the trailing arms be exactly parallel to the ground or even to each other, but it does confirm that my CAD model was accurate and that I successfully adapted the book design for my own purposes.
Had I not previously designed the entire assembly in CAD, I probably would have waited to apply the trailing arm brackets to the chassis until this point in the build. This would have ensured that the trailing arms were parallel to the ground as a function of the tire diameter and chassis ride height.
Also at this stage of the build, at least in theory, the length of the trailing arms should adjusted to establish a pinion angle between the axle's differential input flange and the driveshaft. This is a minor detail that will have to wait until the entire powertrain is bolted together, but it is the major reason why I built adjustability into the rear end by using threaded rod ends.
The next step is to simply measure the distance between the tube adapters and cut a length of tubing for the panhard rod. The tube adapters are then removed from the pre-assembly and tack welded into the ends of the panhard rod.
A great benefit to using rod ends is that you can easily compensate for any mistakes when cutting the length of the panhard tubing. Each rod end easily provides 1/4" adjustability (or more) in either direction, so cutting the panhard to length does not require any great precision.
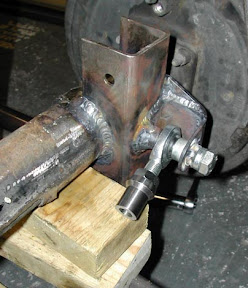
With regards to the length of my panhard rod assembly, I fully anticipated having to adjust the rod ends to get the bracket bolts to line up following the tack welds. You can imagine how suprising it was when I simply threaded the rod ends into the panhard rod without repositioning the jam nuts and everything slipped together! It turns out that by measuring the distance between a trial fitting of the tube adapters thread onto the rod ends, the panhard rod was a perfect fit on the first try!
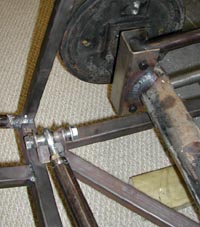
 The value in using left and right threads on opposite ends of the panhard rod is most apparent when it comes time to adjust the panhard rod's length. With the design show here, the panhard rod is really nothing more than a giant turnbuckle. Simply loosen the jam nuts on either end, relieve the weight on the axle by lifting the rear end a little bit, and turn the panhard rod with the flick of your wrist. Be sure to tighten down the jam nuts when you're comfortable with the alignment.