|
The most valuable lesson that I learned was to always tack weld the joints and constantly check for any misalignment induced by the heat of the welder. The placement and the sequence of the tack welds can greatly influence the shape of the structure as well.
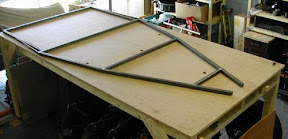
Another lesson learned was a layout trick that I used throughout the build. The medium density fiberboard (MDF) used for the table surface is nicely squared off, making the edge of the table a great reference point for measuring. Instead of laying out a centerline on the work table as suggested by the book, I placed everything on the MDF board at an equal distance from the sides. As long as the tubes are squared and centered on the table then they should be squared and centered on each other. This turned out to be a very effective technique through the entire build.
|